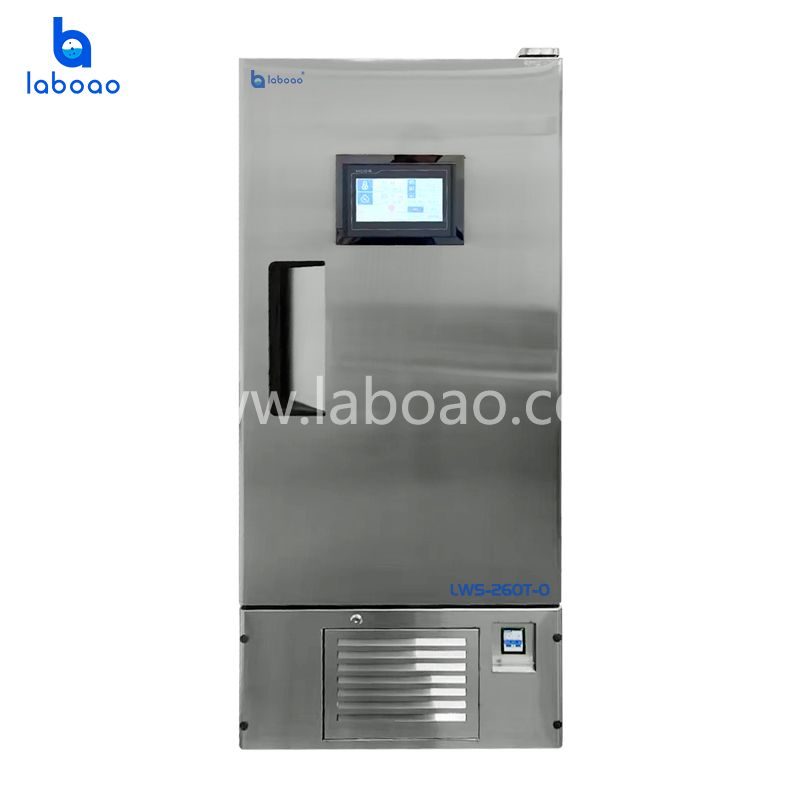
I. Key Points for Daily Maintenance
(1) Cleaning and Care
Regular external cleaning: Wipe the exterior of the equipment weekly with a soft, damp cloth and a neutral detergent to remove dust and stains. Avoid using corrosive cleaners or hard objects that could scratch or damage the painted finish. Wipe dry with a clean cloth afterward to maintain a neat appearance.
Internal cleaning and disinfection: Promptly clear away any residues inside the chamber after each experiment. Perform a thorough cleaning once a month: disconnect the power and allow the internal temperature to drop to room temperature; remove all samples and shelves; wipe the inner walls, partitions, and racks with 75% alcohol or a neutral disinfectant, paying special attention to corners and crevices to prevent bacterial growth from residual contaminants. After cleaning, leave the door open for at least 30 minutes to ensure the disinfectant evaporates completely.
Humidifier cleaning: If the equipment is equipped with a humidifier, inspect and clean it every two weeks. Remove the water tank, empty any remaining water, and scrub the inner walls with a soft brush to remove limescale and impurities. For humidifiers with filtration systems, replace the filter cartridge regularly to prevent clogging that could impair humidification performance. Use distilled or deionized water when refilling to minimize limescale buildup.
(2) Component Inspection and Maintenance
Temperature and humidity sensor calibration: Calibrate the sensors every six months. Place a certified standard thermometer/hygrometer inside the chamber and compare the displayed readings with the standard values at various settings. If the deviation exceeds the equipment's permissible range, contact a professional technician for adjustment and calibration to ensure data accuracy.
Door seal inspection: Inspect the integrity of the door seal monthly, checking for damage, aging, or deformation. If the sealing strip develops cracks or becomes loose, it may cause fluctuations in the chamber's temperature and humidity; the strip must be promptly replaced with one of the same model to ensure a tight seal.
Fan and Air Duct Maintenance: Check the operation of the internal circulation fan quarterly, listening for unusual noises or abnormal rotation speeds. Additionally, clear dust and debris from the air ducts to ensure smooth airflow and prevent uneven temperature and humidity distribution caused by blockages.
Compressor Maintenance: As the core component of the refrigeration system, the compressor requires a clean, dry, and well-ventilated surrounding environment. Avoid continuous long-term operation; turn off the equipment after experiments to allow for adequate rest. If the equipment is out of service for an extended period, power it on and run it 1–2 times a month for at least two hours each time to prevent the aging of internal compressor components.
II. Operating Guidelines
(I) Pre-startup Preparation
Environmental Check: Ensure the equipment is placed on a level, sturdy surface away from heat sources, strong magnetic fields, or corrosive gases. Maintain a clearance of at least 30 cm from walls to ensure proper ventilation.
Sample Preparation: Samples to be cultured must be securely packaged to prevent leakage and contamination of the chamber environment. Volatile or corrosive samples must be sealed before being placed inside to avoid damaging equipment components.
Equipment Check: Inspect the chamber for foreign objects, ensure shelves are securely installed, verify sufficient water levels in the humidifier tank, and check that the power connection is secure.
(II) Startup and Parameter Setting
Startup Procedure: Connect the power supply and turn on the main power switch; the indicator light on the control panel will illuminate. Wait for the equipment to complete its self-test (usually 3–5 seconds) and enter standby mode.
Temperature Setting: Press the "Temperature Setting" key on the control panel to display the current set temperature. Use the "↑" and "↓" keys to adjust to the desired temperature (e.g., 25°C), then press the "Confirm" key to save the setting. Some models support segmented temperature control, allowing for different temperature parameters to be set for specific time intervals based on experimental requirements.
Humidity Setting: Press the "Humidity Setting" key to enter the humidity adjustment interface. Use the directional keys to set the target humidity (e.g., 60% RH) and press the "Confirm" key to apply the setting. If humidity control is not required for the experiment, the humidity function can be set to "Off" mode. Operation Confirmation: Once parameter settings are complete, press the "Run" button to start the equipment. The temperature and humidity inside the chamber will gradually approach the set values, while the control panel displays real-time data.
(III) Operations During Running
Observation and Recording: Periodically observe the equipment's operating status and record temperature and humidity fluctuations during the experiment (recording once per hour is recommended). If abnormal data fluctuations are detected, promptly check for equipment malfunctions or sample irregularities.
Sample Handling: When loading or unloading samples, first press the "Pause" button or open the chamber door (some models pause automatically upon opening). Perform actions quickly to minimize fluctuations in internal temperature and humidity. Close the door after handling samples and press the "Resume" button to continue operation.
Emergency Handling: In the event of unusual noises, odors, or over-temperature/over-humidity alarms, immediately press the "Emergency Stop" button, cut off the power supply, and investigate the cause. Do not continue using the equipment until the fault is resolved.
(IV) Shutdown Procedure
Normal Shutdown: After the experiment concludes, press the "Stop" button. Once the equipment has stopped running, turn off the main switch and disconnect the power supply.
Post-operation Handling: Remove samples from the chamber, clean the equipment according to the "Daily Maintenance" guidelines, and close the chamber door (leaving a small gap for ventilation is advisable to prevent moisture buildup and mold growth).
III. Common Faults and Troubleshooting
Excessive Temperature/Humidity Fluctuations: This may be caused by a worn door seal or an improperly closed door; replace the seal or ensure the door is tightly closed. Alternatively, a fan malfunction could be the cause; check if the fan is operating correctly and replace it if necessary.
Humidifier Not Working: Check if the water tank is empty. If it fails to operate after refilling, the humidification tube may be clogged or the solenoid valve faulty; clean the tube or contact maintenance personnel for repair.
Display Screen Unresponsive: Check the power connection. If the power supply is normal, the control panel may be faulty; discontinue use and contact a professional for repairs.
Strict adherence to the above daily maintenance and operational protocols ensures the stable operation of the constant temperature and humidity incubator, providing reliable environmental support for experimental research. In the event of complex malfunctions, do not attempt to disassemble the unit yourself; instead, promptly contact the manufacturer or professional maintenance personnel.